前端入门教程:学完即可单独完成前端项目
目录
目录
1.SFC && Component API styles:
1.define reactive state properties
1.HTML:
1.1概念
html的来源其实就是我们需要一个语言去和浏览器对话。
html的本质其实就是如下的概念和我们所称他在一个前端的项目里面的一个框架。
html的应用,一是下面的框架,二是他具体的某些标签的使用。三是他的标签的属性字段的使用
如id,class,style,script的使用。
1.html其实就是一个超文本标签语言,他是描述性语言,是用来和浏览器沟通的语言,他的作用是告诉浏览器,我写的东西是什么,标签框的东西,以什么样的形式呈现。比如<p> </p> 表示段落,那么用标签框起来的内容就会以段落的形式表现出来。
2.还有一些有用同一个标签但是又是有小差别的标签的同类型的标签的比如有<input> </input> 那么由于有不同小种类,比如,按钮,输入框,选择框,那么就会在标签里面加上属性字段比如<input type="button" value="kkk"></input> ,我们有不同的属性字段,有type,value,ref,id,class,等等,每个属性字段都有其特殊的用处,其本质相当于又对标签补充说明这个标签框的东西是什么或者用作一些其他功能使用,例如id,class,这几个属性,可以让后面学习的css作为选择器来操作这个标签的样式。
3.而比如我要更改框的内容的样式,比如颜色和一些样边框等等,我们又可以操作一个属性叫做style
<div style='background-color:red'>123</div>
1.2结构
4.一个html文件的结构有5大项如下:
<!DOCTYPE html> // part 1
 ? ?<html lang="en"> //part 2
 ? ? ? ?<head> //part3
 ? ? ? ? ? ?<meta charset="utf-8"> //part5
 ? ? ? ? ? ?<title>this is a test page</title>//part5
 ? ? ? ?</head>
 ? ? ? ?
 ? ? ? ?<body> //part4 在如下的body里面书写标签语句
 ? ? ? ? ? ?
 ? ? ? ?</body>
</html>
?
1.3常见的标签使用分类:
5.常见标签分类:
<!DOCTYPE html>
<html lang="en">
<head>
 ? ?<meta charset="UTF-8">
 ? ?<meta http-equiv="X-UA-Compatible" content="IE=edge">
 ? ?<meta name="viewport" content="width=device-width, initial-scale=1.0">
 ? ?<title>Document</title>
</head>
<body>
 ? ?
 ? ?<h1>一级标题</h1>
 ? ?<h2>二级标题</h2>
 ? ?<h3>三级标题</h3>
 ? ?<h4>四级标题</h4>
 ? ?<h5>五级标题</h5>
 ? ?<h6>六级标题</h6>
 ? ?
 ? ?<!-- 段落标签 -->
 ? ?<p>ssssssssssssssssssss</p>
 ? ?<p>ssssssssssssssssssss</p>
 ? ?<p>ssssssssssssssssssss</p>
 ? ?<p>ssssssssssssssssssss</p>
?
 ? ?<b>加粗的效果</b>
 ? ?<i>倾斜的效果</i>
 ? ?<s>删除线的效果</s>
 ? ?<u>下划线的效果</u>
?
 ? ?<!--行内标签-->
 ? ?<p><b>加粗的效果</b></p>
 ? ?<i>倾斜的效果</i>
 ? ?<s>删除线的效果</s>
 ? ?<u>下划线的效果</u>
?
 ? ?<!--图片标签-->
 ? ?<img src="图片来源地址" alt="aaa" width="300px" height="300px">
 ? ?
 ? ?
 ? ?<!--超链接标签-->
 ? ?<a href="https://www.baidu.com/">百度</a>
 ? ?
 ? ?<!--表格标签-->
 ? ? ?<table width="500px" height="500px" border="1px">
 ? ? ? ?<tr>
 ? ? ? ? ? ?<th>学号</th>
 ? ? ? ? ? ?<th>姓名</th>
 ? ? ? ? ? ?<th>宿舍</th>
 ? ? ? ?</tr>
 ? ? ? ?<tr>
 ? ? ? ? ? ?<td>1</td>
 ? ? ? ? ? ?<td>张三</td>
 ? ? ? ? ? ?<td>1</td>
 ? ? ? ?</tr>
 ? ? ? ?<tr>
 ? ? ? ? ? ?<td>2</td>
 ? ? ? ? ? ?<td>李四</td>
 ? ? ? ? ? ?<td>2</td>
 ? ? ? ?</tr><tr>
 ? ? ? ? ? ?<td>3</td>
 ? ? ? ? ? ?<td>王五</td>
 ? ? ? ? ? ?<td>3</td>
 ? ? ? ?</tr>
 ? ?</table>
 ? ?
 ? ?
    <!--列表标签-->
 ? ? <ol><li>哈哈哈</li><li>哈哈哈</li><li>哈哈哈</li></ol>
 ? ?<ul><li>哈哈哈</li><li>哈哈哈</li><li>哈哈哈</li></ul>
?
 ? ?<!--表单标签-->
 ? ?<input type="text">用户名
 ? ?<input type="password">密码
 ? ?<input type="radio" name="one">单选1
 ? ?<input type="radio" name="one">单选2
 ? ?<input type="checkbox">A
 ? ?<input type="checkbox">B
 ? ?<input type="checkbox">C
?

 ?  用户名<input type="text">
 ?  密码<input type="password">
 ? ?<input type="radio" name="one" id="1"><label for="1">单选1</label>
 ? ?
 ? ?<input type="radio" name="one" id="2"><label for="2">单选2</label>
 ? ?<input type="checkbox">A
 ? ?<input type="checkbox">B
 ? ?<input type="checkbox">C
?
?
    <input type="button" value="这是按钮" onclick="alert('按钮')">
 ?  提交一个文本<input type="file" >
?
 ? ?
 ? ?<!--下拉菜单-->
 ? ?<select>
 ? ?<option>男</option>
 ? ?<option>女</option>
 ? </select>
 ? ?
 ?<!--多行文本框-->
 ? ?
<textarea name="" id="" cols="30" rows="10"></textarea>
 ? ?
</body>
</html>
2.CSS:
2.1概念
css的来源就是html里面的style属性的抽离处理的。
css的本质其实就是用style来渲染html的样式,告诉浏览器这个html是以什么样的颜色和样式呈现。还有就是他是整个框架里面类似于一个美丽的衣服的角色,给框架披上一个衣服。
css的使用,一个是css的选择器的概念,再就是行内样式,内页样式,外部样式的学习,再就是如何进行选择器和标签对应。
CSS的来源其实就是上面html上面概念的第3点,我们单独的把这个style的属性拿出来,放到head里面,用一个style的标签来框上所有的样式的属性。
而真正的分类一下,上面讲的第三点叫做行内样式,单独拿出来做一个脚本放在head里面叫做内页样式。还有一种,我们用ref属性和href属性来标明一个外部css文件,这样就是外部样式。
//行内样式:
<div style='background-color:red'>123</div>
?
//内页样式:
?
?
<html>
    <head>
        <title>Test</title>
        <style>
            .logo{
                background-color:red;
            }
        </style>
    </head>
?
    <body>
        <div class='logo'>123</div>
    </body>
</html>
?
//外部样式:
?
<html>
    <head>
        <title>Test</title>
 ? ? ? ? ? ?<link rel='stylesheet' href='common1.css'/>
 ? ? ?  //rel 是 relationship的缩写 这个属性在这里的意思是 这个链接连接过去的是一个样式表
    </head>
?
    <body>
        <div class="logo">123</div>
    </body>
</html>
?
.logo {
 ?  background-color: red;
 ?  color: white;
}
?
?
2.2样式实践:
以下的举例都来自于博客:
https://www.cnblogs.com/whatisfantasy/p/6168416.html
1) *block(区块)
行高 line-height:数值 | inherit | normal; 字间距 letter-spacing: 数值 | inherit | normal; 词间距 word-spacing: 数值 | inherit | normal; 空格 white-space: pre(保留) | nowrap(不换行) | normal;

/*表格宽度自适应*/
th {
white-space: nowrap;
}
显示 display:

none; /*不显示,使用的场景非常多*/
block; /*把内联标签变成块级标签*/
inline; /*把块级标签变成内联标签*/
list-item; /*列表项*/
run-in; /*追加部分*/
compact; /*紧凑*/
marker; /*标记*/
table;
inline-table;
table-raw-group;
table-header-group;
table-footer-group;
table-raw;
table-column-group;
table-column;
table-cell;
table-caption; /*表格标题*/
(2) *box(盒子)
宽度 width: 长度 | 百分比 | auto; 高度 height: 长度 | 百分比 | auto; 清除 clear: none | left | right | both; 边界 margin: 上 右 下 左 ; 填充 padding: 上 右 下 左 ; 定位 position: absolute | relative | static; 透明度 visibility: inherit | visible | hidden; 溢出 overflow: visible | hidden | scroll auto; 裁切 clip: rect(12px,auto,12px,auto)

(3) float(漂浮)
漂浮 float: left | right | none; 在页面布局的时候用的最多

常见用法
<div style='background-color:red;float:left;width: 50%;' >div1</div>
<div style='background-color:green;float:right;width: 50%;' >div2</div>
一个问题
子标签使用了float时候,父标签的样式失效

<div style='background-color:red;'>
 ? ?<div style="float: left">div1</div>
 ? ?<div style="float: left">div2</div>
</div>
解决方案一:clear: both

<div style='background-color:red;'>
 ? ?<div style="float: left">div1</div>
 ? ?<div style="float: left">div2</div>
 ? ?<div style="clear: both;"></div> <!--加上clear:both之后就正常了-->
</div>
解决方案二:clearfix

<div style='background-color:red;' class="clearfix">
 ? ?<div style="float: left">div1</div>
 ? ?<div style="float: left">div2</div>
</div>
.clearfix:after{
 ?  content: ".";
 ?  display: block;
 ?  height: 0;
 ?  clear: both;
 ?  visibility: hidden;
}
(4) position(定位)
fixed
一般用来写网页顶端的固定导航条,或者两侧的菜单。

<!--对于块级标签来说加上position:fixed之后,该div就不会占一整行,一般需要手动定义宽度,如width:100%-->

<div style="position:fixed;height:10%;background-color:lightskyblue;color:white;width:100%;top:0px;">我是导航</div>
<div style="">
 ? ?<div style="position:fixed;bottom: 0px;top:10%;float: left;width: 20%;background-color:indianred">我是菜单</div>
 ? ?<div style="float: right;width:80%;"><p>我是内容</p>
 ? ? ? ?<p>我是内容</p>
 ? ? ? ?<p>我是内容</p>
 ? ? ? ?<p>我是内容</p>
 ? ? ? ?<p>我是内容</p>
 ? ? ? ?<p>我是内容</p>
 ? ? ? ?<p>我是内容</p>
 ? ? ? ?<p>我是内容</p>
 ? ? ? ?<p>我是内容</p>
 ? ? ? ?<p>我是内容</p>
 ? ? ? ?<p>我是内容</p>
 ? ? ? ?<p>我是内容</p>
 ? ? ? ?<p>我是内容</p>
 ? ? ? ?<p>我是内容</p>
 ? ? ? ?<p>我是内容</p>
 ? ? ? ?<p>我是内容</p>
 ? ? ? ?<p>我是内容</p>
 ? ? ? ?<p>我是内容</p>
 ? ? ? ?<p>我是内容</p>
 ? ? ? ?<p>我是内容</p>
 ? ? ? ?<p>我是内容</p>
 ? ? ? ?<p>我是内容</p>
 ? ? ? ?<p>我是内容</p>
 ? ? ? ?<p>我是内容</p>
 ? ? ? ?<p>我是内容</p>
 ? ? ? ?<p>我是内容</p>
 ? ? ? ?<p>我是内容</p>
 ? ? ? ?<p>我是内容</p>
 ? ?</div>
</div>
absolute与relative
这两者一般配合使用,用于调整div之间的相对位置

<div style="position:relative;width: 300px;height: 150px;">
 ? ?<div style="position:absolute;float: left;width: 20%;background-color:indianred;bottom: 0px;right: 0px;">我是菜单</div>
</div>
(5) 透明度
.image{
 ? ?opacity: 0.5
}
<img src="http://www.jotlab.com/wp-content/uploads/2008/08/python.jpg" style="opacity: 0.5; width:50%; height:50%; ">
(6) font(字体)
颜色 color: 数值; 大小 font-size: 数值; 字体 font-family: "Courier New", Courier, monospace, "Times New Roman", Times, serif, Arial, Helvetica, sans-serif, Verdana 样式 font-style: oblique;(偏斜体) italic;(斜体) normal;(正常) 粗细 font-weight: bold;(粗体) lighter;(细体) normal;(正常) 变体 font-variant: small-caps;(小型大写字母) normal;(正常)

(4) background(背景)
背景 background: transparent; /透视背景*/ 颜色 background-color: 数值; 图片 background-image: url() | none; 重复 background-repeat: inherit | no-repeat | repeat | repeat-x | repeat-y;

background-repeat : repeat; /*重复排列-网页默认*/
background-repeat : no-repeat; /*不重复排列*/
background-repeat : repeat-x; /*在x轴重复排列*/
background-repeat : repeat-y; /*在y轴重复排列*/
滚动 background-attachment: fixed | scroll; 位置 background-position:数值 | top | bottom | left | right | center;

background-position : 90% 90%; /*背景图片x与y轴的位置*/
background-position : top; /*向上对齐*/
background-position : buttom; /*向下对齐*/
background-position : left; /*向左对齐*/
background-position : right; /*向右对齐*/
background-position : center; /*居中对齐*/
简写 background:背景颜色 | 背景图象 | 背景重复 | 背景附件 | 背景位置 ;

(7) text(文本)
大小写 text-transform: capitalize | uppercase | lowercase | none; 修饰 text-decoration: underline;(下划线) overline;(上划线) line-through;(删除线) blink;(闪烁) 排列 text-align: justify | left | right | center; 缩进 text-indent: 数值 | inherit; 阴影 text-shadow:数值;

(8) border(边框)
边框样式 border-style: dotted;(点线) dashed;(虚线) solid; double;(双线) groove;(槽线) ridge;(脊状) inset;(凹陷) outset; 边框宽度 border-width: ; 边框颜色 border-color: top值 right值 bottom值 left值; 简写 border: width style color;

边  框 {border:border-width border-style color}
上 边 框 {border-top:border-top-width border-style color}
右 边 框 {border-right:border-right-width border-style color}
下 边 框 {border-bottom:border-bottom-width border-style color}
左 边 框 {border-left:border-left-width border-style color}
(9) list-style(列表样式)
类型 list-style-type: disc | circle | square | decimal | lower-roman | upper-roman | lower-alpha | upper-alpha | none;

list-style-type:none; /*不编号*/
list-style-type:decimal; /*阿拉伯数字*/
list-style-type:lower-roman; /*小写罗马数字*/
list-style-type:upper-roman; /*大写罗马数字*/
list-style-type:lower-alpha; /*小写英文字母*/
list-style-type:upper-alpha; /*大写英文字母*/
list-style-type:disc; /*实心圆形符号*/
list-style-type:circle; /*空心圆形符号*/
list-style-type:square; /*实心方形符号*/
位置 list-style-position: outside | inside; 图像 list-style-image: URL; 简写 list-style:目录样式类型 | 目录样式位置 | url;

(10) margin(边界)
margin-top:10px; (上边界) margin-right:10px; (右边界) margin-bottom:10px; (下边界值) margin-left:10px; (左边界值) margin-inside:; margin-outside:;

(11) padding(填充)
padding-top:10px; /*上边框留空白*/
padding-right:10px; /*右边框留空白*/
padding-bottom:10px; /*下边框留空白*/
padding-left:10px; /*左边框留空白
(12) vertical(垂直)
vertical-align:sub; /*下标字*/
vertical-align:super; /*上标字*/
vertical-align:top; /*垂直向上对齐*/
vertical-align:bottom; /*垂直向下对齐*/
vertical-align:middle; /*垂直居中对齐*/
vertical-align:text-top; /*文字垂直向上对齐*/
vertical-align:text-bottom; /*文字垂直向下对齐*/
(13) a(链接)
a /*所有超链接*/
a:link /*超链接文字格式*/
a:visited /*浏览过的链接文字格式*/
a:active /*按下链接的格式*/
a:hover /*鼠标转到链接*/
(14) cursor(光标)
光标形状 cursor:hand | crosshair | text | wait | move | help | e-resize | nw-resize | w-resize | s-resize | se-resize | sw-resize;

/*也可以自定义*/
cursor: hand; /*链接手指*/
cursor: crosshair /*十字体 */
cursor: s-resize /*箭头朝下 */
cursor: move /*十字箭头, 朝右*/
cursor: help /*加一问号 */
cursor: w-resize /*箭头朝左 */
cursor: n-resize /*箭头朝上 */
cursor: ne-resize /*箭头朝右上 */
cursor: nw-resize /*箭头朝左上 */
cursor: text /*文字型*/
cursor: se-resize /*箭头斜右下 */
cursor: sw-resize /*箭头斜左下*/
cursor: wait /*漏斗*/
LESS 复制 全屏
2.3css选择器:
什么是css选择器:
ccs相当于一个网页的骨架,而css就是给骨架披了一个美丽的外衣。
我们如何对这个骨架进行一个包装呢,我们怎么样能对对应的某一个骨头和某一个对应的html标签进行一个美化或者说进行一个css样式的渲染呢。那这时候就需要css选择器。也就是css寻找对应标签的一个方式和规则。
而这种方式的实现就是在html标签里面用属性id,class,和标签名字来和style里面的#id , .class, 标签名进行对应,即可对对应的html进行对应的css样式渲染。
举例如下:
?
?
?
<!DOCTYPE html>
<html lang="en">
<head>
 ? ?<meta charset="UTF-8">
 ? ?<meta http-equiv="X-UA-Compatible" content="IE=edge">
 ? ?<meta name="viewport" content="width=device-width, initial-scale=1.0">
 ? ?<title>Document</title>
 ? ?
 ? ?<style>
 ?p {
 ?color: blue;
}
?
?
.highlight {
 ?background-color: yellow;
}
?
?
#runoob {
 ?width: 200px;
}
 ? ?</style>
 ? ?
</head>
 ? ?
<body>
 ? ? <p>
 ? ? ? ? ?  this is blue
 ? ?</p>
 ? ? ? ?
 ? ?<div id="runoob">
 ? ? ?  this is id
 ? ?</div>
 ? ?
 ? ?<div class="highlight">
 ? ? ?  this is highlight
 ? ?</div>
 ? ?
</body>
 ? ?
</html>
2.4Demo
<!DOCTYPE html>
<html>
<head>
 ? ?<title>This is a demo</title>
 ? ?<meta http-equiv="Content-Type" content="text/html; charset=utf-8"/>
 ? ?<style type="text/css">
 ? ? ? ?body {
 ? ? ? ? ? ?background-color: #e1ddd9;
 ? ? ? ? ? ?font-size: 12px;
 ? ? ? ? ? ?font-family: Verdana, Arial, Helvetica, SunSans-Regular, Sans-Serif;
 ? ? ? ? ? ?color: #564b47;
 ? ? ? ? ? ?padding: 0px;
 ? ? ? ? ? ?margin: 0px;
 ? ? ?  }
 ? ? ? ?#inhalt {
 ? ? ? ? ? ?position: absolute;
 ? ? ? ? ? ?height: 200px;
 ? ? ? ? ? ?width: 400px;
 ? ? ? ? ? ?margin: -100px 0px 0px -200px;
 ? ? ? ? ? ?top: 50%;
 ? ? ? ? ? ?left: 50%;
 ? ? ? ? ? ?text-align: center;
 ? ? ? ? ? ?padding: 0px;
 ? ? ? ? ? ?background-color: #f5f5f5;
 ? ? ? ? ? ?border: 1px dotted #000000;
 ? ? ? ? ? ?overflow: auto;
 ? ? ?  }
 ? ? ? ?p, h1 {
 ? ? ? ? ? ?margin: 0px;
 ? ? ? ? ? ?padding: 10px;
 ? ? ?  }
 ? ? ? ?h1 {
 ? ? ? ? ? ?font-size: 11px;
 ? ? ? ? ? ?text-transform: uppercase;
 ? ? ? ? ? ?text-align: center;
 ? ? ? ? ? ?color: #564b47;
 ? ? ? ? ? ?background-color: #90897a;
 ? ? ?  }
 ? ? ? ?a {
 ? ? ? ? ? ?color: #ff66cc;
 ? ? ? ? ? ?font-size: 11px;
 ? ? ? ? ? ?background-color: transparent;
 ? ? ? ? ? ?text-decoration: none;
 ? ? ?  }
 ? ?</style>
</head>
<body>
<div id="inhalt">
 ? ?<p>
 ? ?<h1>Morra's Demo</h1><br/><br/>
 ?  This area should be horizontally and vertically centered.<br/>
 ?  This text stays left aligned<br/>
 ? ?<a href="http://www.cnblogs.com/whatisfantasy/">what is fantasy?</a>
 ? ?</p>
 ? ?<p>
</div>
</body>
</html>
?
3.JavaScript:
JavaScript的来源也是html的属性。
JavaScript本质就是用代码告诉浏览器应该执行对应的代码,就像是在给一个批了外衣的框架上给每一个模块加上器官也就赋予每个模块功能。
javascript的使用就是学习数据类型,基本语句,函数。
1.数据:
1.1基本数据类型:
直接量:
数值,逻辑值,字符串,null,undefined,
1.2变量:
类似于var a = .... 那么这个就是变量
基本数据类型都可以作为一个变量
1.3引用数据类型:
对象,函数,数组:
对象,数组 ,数组其实就是new 构造函数得到的对象。
方法,函数, 函数其实就是方法
数组:
动态创建数组:
var a = new array();
var a = new arrary(5);
加的话就用push
a.push()
静态创建数组:
var a = [1,3,5,6,7]
var a = new array("")
和java语言相比较:
//动态new 数组
int[] a ; //直接先创建一个无传参的数组 后面再赋值
a = new int[3];
int[] a1 = new int[3]; //创建一个一定长度的数组 ,后面再赋值
a1[2] = 3;
?
//静态new 数组
int [] b = new int[] {1,2,3}; //创建数组 静态赋值
int[] c = {3,345,6,7}; //直接给数组数据
对象的使用方法:
var container = {
name:"nonon",
type:"hhh"
}
调用有两种方法,一种是container[name] , 一种是container.type
2.基础语句:
2.1运算符:
a++,a--,--a,--b, a++,就是a先放在语句里面运算后再进行++操作,++a就是先计算++的运算得出的值再放到语句里面执行。
2.2循环语句:
循环3种:
for,
while,
for each
for(var p in ps){
}
2.3条件语句
条件语句2种:
if else if else
三元运算符 ? :
3.函数七重关:
3.1函数的定义和js编译原理:
函数的定义的两种方法:
var a = function (){
}
function a () {
}
js的编译原理:
举例: var a = 3;
1.分词
把一句话分开
var , a , = , 3
如果经过分词的步骤,那么得到的结果就是‘var、a、=、2、;’。”
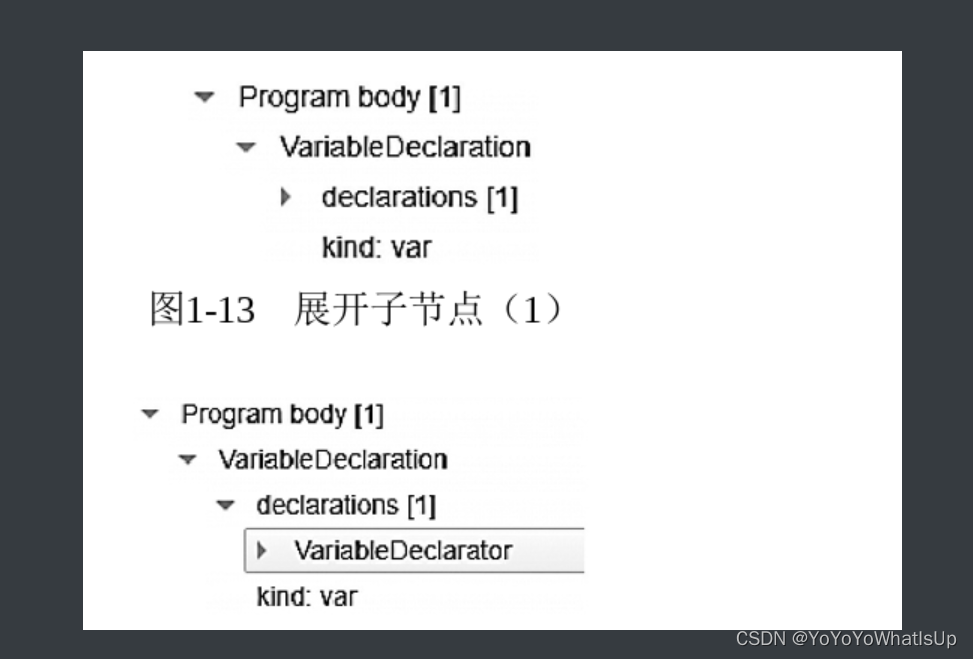
2.解析
描述语句,用树这样一个一个捋下来
比如数的第一个节点叫做语句,这个语句是一个赋值语句。
这个赋值语句下面有两个小节点,一个是赋值的变量是什么类型 : var 二个是有几个变量 1个
这个赋值语句的节点下还有两个节点,一个是变量名字和变量的值是什么。

类似的还有函数的表达式的抽象语法数如下:
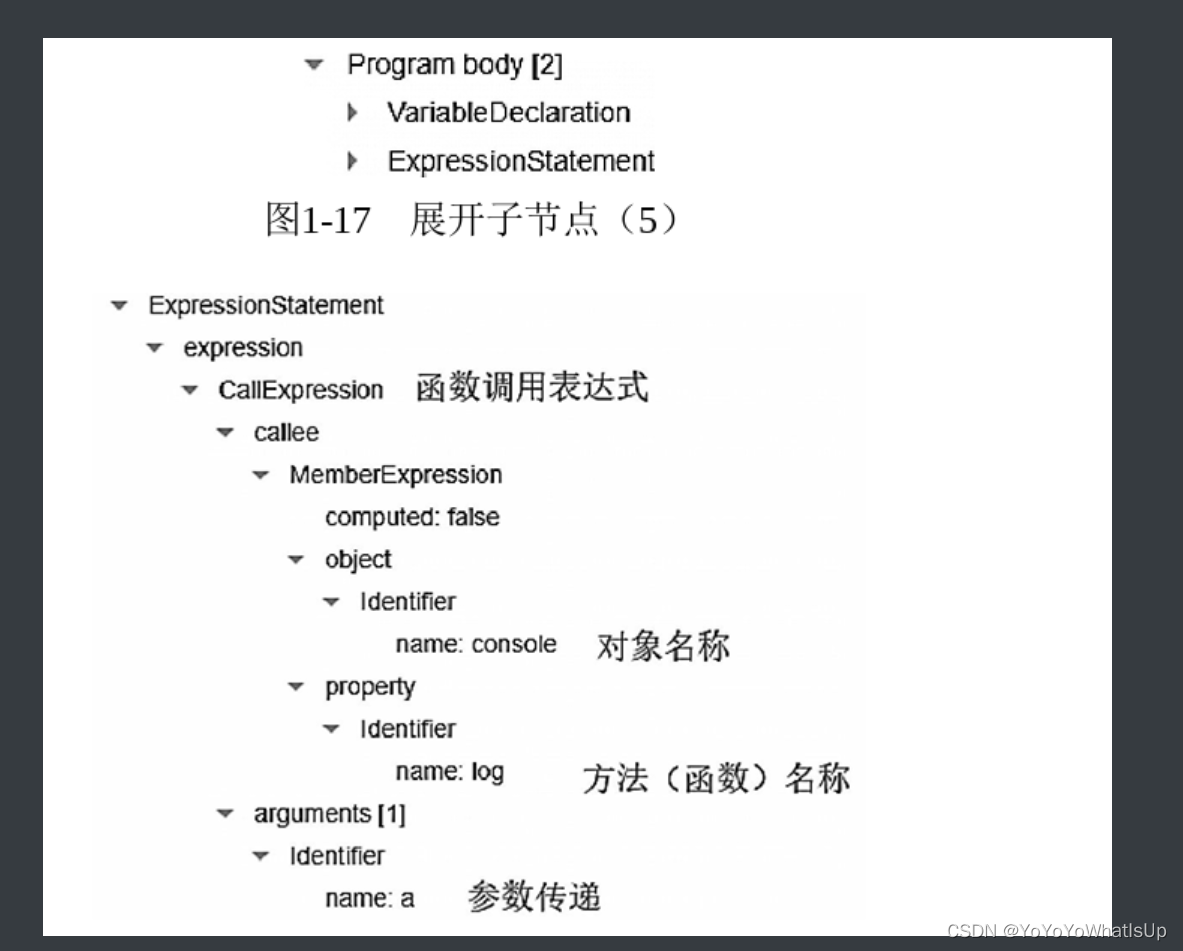
抽象树的生成网站如下:
3.代码生成 :
代码生成。在这个过程中, JavaScript引擎会把在第二个步骤中生成的抽象语法树进行转换,转换成可执行的代码。也就是最终生成出来的就是一些机器指令。
3.2作用域
记住两点就行:
作用域分为函数作用域和全局作用域,
全局作用域不可以访问函数作用域的变量
函数作用域可以访问全局作用域的变量
3.3传参
传参就是函数传入进来的参数,这里没有什么特殊的地方
稍微特殊需要提一下就是 函数类似于一个榨汁机,你把水果放进去,我们可以得到
你想要的东西。
再就是特殊的是,在传入没有定义的函数的传参的时候:所有的参数都会被装载到函数内部一个叫 作arguments的数组里面
3.4闭包:
闭包满足三点:
function test(){
let a = 3;
return function (){
cosole.log(a)
}
}
四大要素:
第一点:在函数内部也有一个函数。就好比这个例子,在test函数 里面还有一个函数。
第二点:函数内部的函数里面用到了外部函数的 局部变量。还是这个例子,test函数里面有一个局部变量a,并且被内部 函数使用了。
第三点:外部函数把内部函数作为返回值return。
第四点:调用内部函数的时候,访问的都是同 一个变量a了。相当于在全局作用域里面定义了一个变量a, 然后在函数中操作全局变量。利用闭包 操作可以减少很多不必要的全局变量。全局作用域是一块公共区域,如果为了某个单一的功能而定义一个全局变量,则会导致全局变量过多,因此在这种情况下,还是要优先考虑使用闭包。
3.5自执行函数:
语法: (定义一个没有名字的函数)():
自执行函数一般可以和闭包配合使用
var inner =(
fuction(){
let a = 0
return function(){
console.log(a);
}
)()
inner(2);

3.6new函数:
来源是这样的: 在我们js里面每一个方法都是来源于一个对象的,当我们在script里面去
定义一个函数的时候,其实这个函数是属于一个类的,而当我们new 这个函数的时候,就
会得到这个类,这个函数也叫做构造函数,由于函数有传参,我们再通过this关键字。
这样我们new函数的时候就可以得到一个有几个属性的对象了。
两点:
每个函数都有一个对象,在new的时候会得到这个对象,这个函数也叫做构造函数。
需要得到一个有特殊几个属性的对象,可以用new +this + 函数传参,可以得到一个有特殊几个属性的对象。
例如:
funtion test(a,b,c){
this.a = a;
this.b= b;
this.c=c;
}
var a = new test(1,2,3);
这样就得到了一个a对象,里面有三个属性a,b,c;
这样我们就得到了属性有a,b,c的一个对象。
3.7回调函数:
也就是三点:
callback函数其实就是把callback函数当成传参传入一个函数。
一个步骤是写这个函数。
二个步骤是写这个callback函数。当作为callback函数时,定义的时候不需要写名字,直接写function(){
}
三个步骤是调用这个函数。
举例:
定义函数:
var a = function ( food, callback){
callback(food);
}
callback函数:
function(food){
console.log("i like the" + food);
}
调用函数:
a(food, function (food){
console.log("i like the" + food);
})
4.Vue_learning_1.1
建议大家学习vue就用官网的教程来学习,官网的教程写得很详细:
https://vuejs.org/tutorial/#step-1
1.SFC && Component API styles:
1.1 SFC
Before we learn vue we have to know two definitions .
the first definition is SFC .
we author Vue components using an HTML-like file format called Single-File Component
A Vue SFC encapsulates the component's logic (JavaScript), template (HTML), and styles (CSS) in a single file. Here's the previous example, written in SFC format:
An SFC is a reusable self-contained block of code that encapsulates HTML, CSS and JavaScript that belong together, written inside a .vue file.
1.2 Vue components API styles
the Second definition is Component Api styles.
Vue components can be authored in two different API styles:
Options API and Composition API.
In fact, the Options API is implemented on top of the Composition API!
Options API
we define a component's logic using an object of options Properties defined by options are exposed on this inside functions, which points to the component instance
The Options API is centered around the concept of a "component instance"
Composition API.
The Composition API is centered around declaring reactive state variables directly in a function scope and composing state from multiple functions together to handle complexity
2.The core feature of Vue
2.1 declarative rendering
three steps:
1.define reactive state properties
2.write template
3.render template
2.2 how to render
2.2.1 Use Option API style
1.render dynamic text
<!DOCTYPE>
<html lang="en">
?<head>
? ?<meta charset="utf-8">
? ?<script type="moudle"> //在script标签中写js代码,或者使用src引入js文件时,默认不能使用module形式,即不能使用import导入文件,但是我们可以再script标签上加上type=module属性来改变方式。
? import {createApp} from 'vue'
? ? createApp({
? ? data(){
? ? ? return {
? ? ? ? test:"this is a testing dynamic "
? ? ? ? }
? ? ? }
? ? }).mount("#test")
? ?</script>
?</head>
?
?<body>
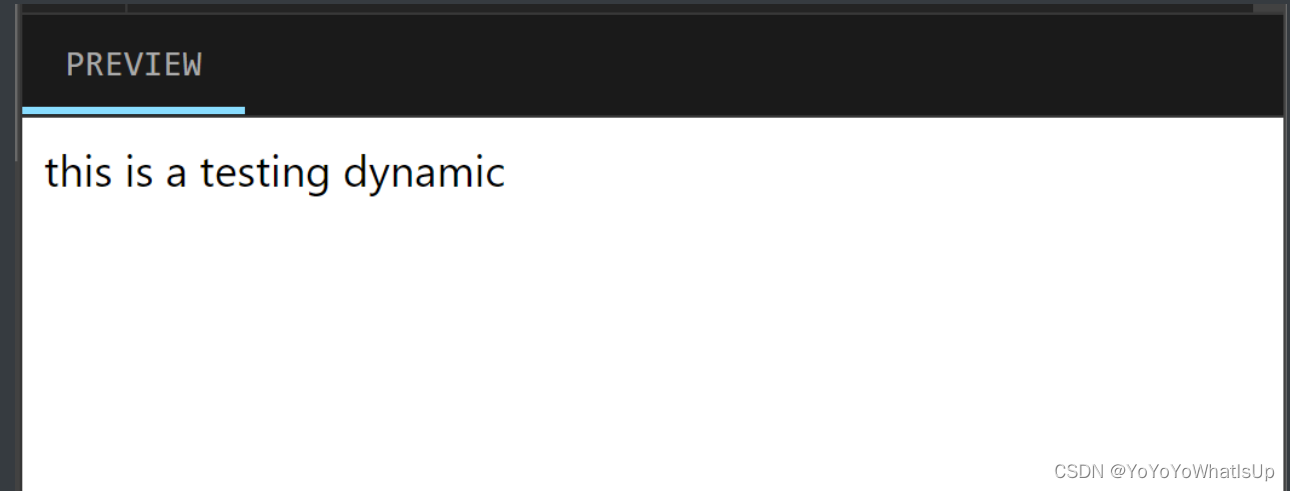
? ?<div id="test"> ? //通过{{}} 插值表达式 来渲染动态的文本
? ? {{test}}
? ?</div>
?</body>
</html>结果截图:
官网的案例:
<script type="module">
import { createApp } from 'vue'
?
createApp({
 ?data() {
 ? ?return {
 ? ? ?message: 'Hello World!',
 ? ? ?counter: {
 ? ? ? ?count: 0
 ? ?  }
 ?  }
  }
}).mount('#app')
</script>
?
<div id="app">
 ?<h1>{{ message }}</h1>
 ?<p>Count is: {{ counter.count }}</p>
</div>
2.render attribute
<script type="module">
import { createApp } from 'vue'
?
createApp({
 ?data() {
 ? ?return {
 ? ? ?message: 'Hello World!',
 ? ? ?counter: {
 ? ? ? ?count: 0
 ? ?  }
 ?  }
  }
}).mount('#app')
</script>
?
<div id="app">
 ?<h1>{{ message }}</h1>
 ?<p>Count is: {{ counter.count }}</p>
</div>
结果截图:

官网案例:
<script type="module">
import { createApp } from 'vue'
?
createApp({
 ?data() {
 ? ?return {
 ? ? ?titleClass: 'title'
 ?  }
  }
}).mount('#app')
</script>
?
<div id="app">
 ?<h1 :class="titleClass">Make me red</h1>
</div>
?
.title {
  color: red;
}
?
?
3.render event listener
<!DOCTYPE>
<html lang="en">
?<head>
? ?<meta charset="utf-8">
? ?<style>
? ? ?#yellow{
? ? ? ?color:yellow
? ? }
? ? ?#blue{
? ? ? ?color:blue
? ? }
? ?</style>
? ?<script type="moudle">
? import {createApp} from 'vue'
? createApp({
? data(){
? ? return {
? ? ? test:"this is a testing dynamic text",
? ? ? ? counts:{
? ? ? ? count:0
? ? ? ? },
? ? ? ? color:"yellow",
? ? ? ? newcolor:"blue"
? ? ? }
? ? },
? ? ? ? methods:{
? ? ? incre(){
? ? ? ? ? this.counts.count++
? ? ? ? },
? ? ? ? de (){
? ? ? ? ? this.counts.count--
? ? ? ? }
? ? ? }
? }).mount("#test")
? ?
? ?</script>
? ?
?</head>
?
?<body>
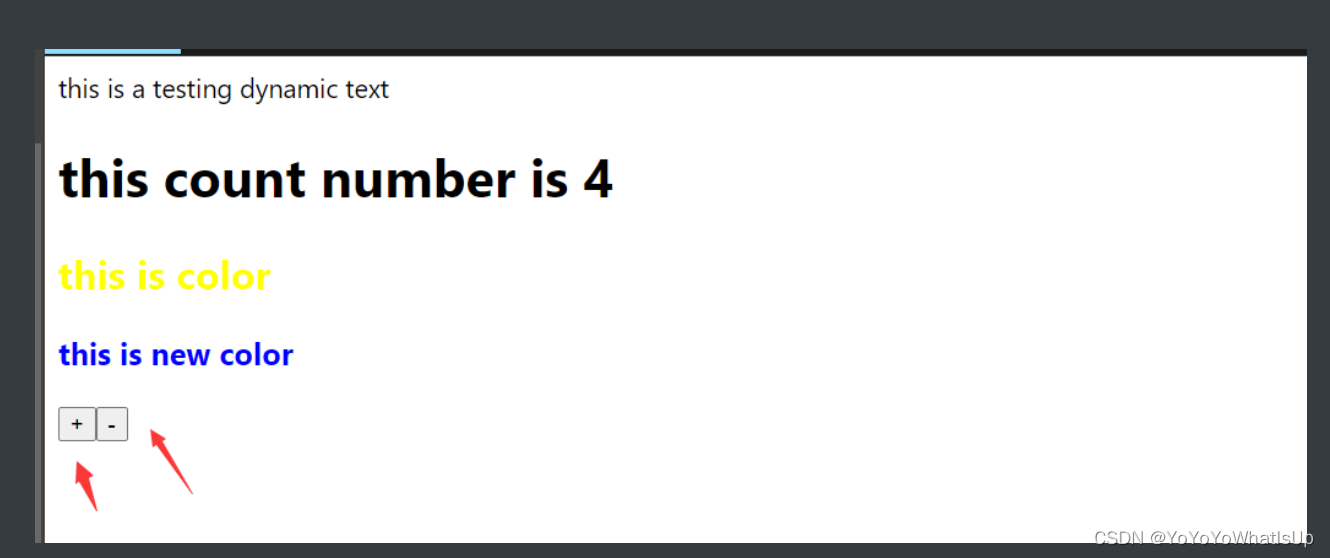
<div id="test">
? ? {{test}}
? ? ?
? ? ?<h1>
? ? this count number is {{counts.count}}
? ? ?</h1>
? ?
? ? ?<h2 v-bind:id="color"> ?
? ? ? this is color
? ? ? ?
? ? ?</h2>
? ? ?
? ? ?<h3 :id="newcolor">
? ? ? ? this is new color
? ? ?</h3>
? ? ?
? ? ?<button v-on:click="incre">
? ? ? +
? ? ?</button>
?
? ? ? ?<button @click="de">
? ? ? -
? ? ?</button>
? ?</div>
?</body>
</html>结果截图:
官网案例:
<script type="module">
import { createApp } from 'vue'
?
createApp({
 ?data() {
 ? ?return {
 ? ? ?count: 0
 ?  }
  },
 ?methods: {
 ? ?increment() {
 ? ? ?this.count++
 ?  }
  }
}).mount('#app')
</script>
?
<div id="app">
 ?<button @click="increment">count is: {{ count }}</button>
</div>
4.form bindings
在学习表单绑定前一定要知道:
methods: {
 ?onInput(e) {
 ? ?// v-on 处理函数会接收原生 DOM 事件 也就是DOM这个对象
 ? ?// 作为其参数。
 ? ?this.text = e.target.value
  }
}
?
用这个方法让input输入的改变的值绑定变量,然后我们再用input的v-bind:value这个指令,把input的值绑定。
这样就实现了把这个方法和 v-bind:value 一起整合成一个指令: v-moudle 这样既可以改变value,又可以在修改value后,value值随着修改的值一起改变。
<!DOCTYPE>
<html lang="en">
?<head>
? ?<meta charset="utf-8">
? ?<script type="moudle">
? import {createApp} from 'vue'
? createApp({
? data(){
? ? return {
? ? ? test:"this is a testing dynamic text",
? ? ? ? text:"yyyyyy",
? ? ? ? counts:{
? ? ? ? count:0
? ? ? ? },
? ? ? ? color:"yellow",
? ? ? ? newcolor:"blue"
? ? ? }
? ? },
? ? ? ? methods:{
? ? ? ? output(e){
? ? ? ? this.text=e.target.value
? ? ? ? }
?
? ? ? }
? }).mount("#test")
? ?
? ?</script>
? ?
?</head>
?
?<body>
? ?<div id="test">
? ? ?<input v-bind:value="text" v-on:click="output" >
? ? ?<h1>
? ? ? {{text}}
? ? ?</h1>
? ?</div>
?</body>
</html>
?
?
?
?
<!DOCTYPE>
<html lang="en">
 ?<head>
 ? ?<meta charset="utf-8">
 ? ?<script type="moudle">
 ?  import {createApp} from 'vue'
 ?  createApp({
 ?      data(){
 ? ?    return {
 ? ? ?      test:"this is a testing dynamic text",
 ? ? ? ?  text:"yyyyyy",
 ? ? ? ?  counts:{
 ? ? ? ?        count:0
 ? ? ? ?  },
 ? ? ? ?  color:"yellow",
 ? ? ? ?  newcolor:"blue"
 ? ? ?  }
 ? ?  }
 ?  }).mount("#test")
 ? ?
 ? ?</script>
 ? ?
 ?</head>
 ?
 ?<body>
 ? ?<div id="test">
 ? ? ?<input v-model="text" placeholder= "type here">
 ? ? ?<h1>
 ? ? ?  {{text}}
 ? ? ?</h1>
 ? ?</div>
 ?</body>
</html>
?
?
?
官网案例:
<script type="module">
import { createApp } from 'vue'
?
createApp({
?data() {
? ?return {
? ? ?text: ''
? }
}
}).mount('#app')
</script>
?
<div id="app">
?<input v-model="text" placeholder="Type here">
?<p>{{ text }}</p>
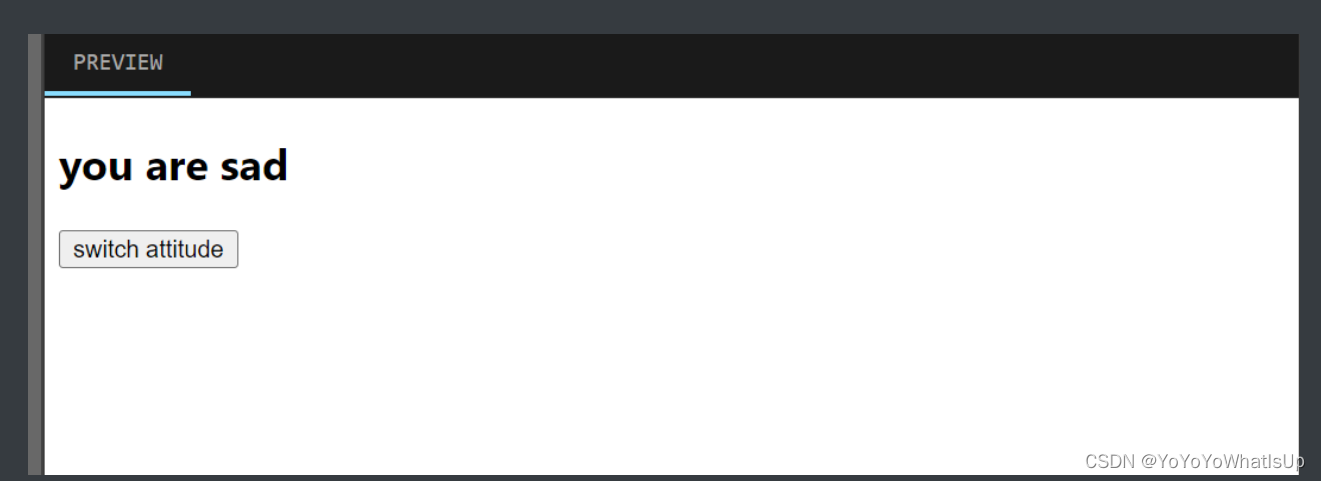
</div>5.conditionally render
这个条件选择的指令,类似于,用v-if="" 这个"" 里面放着true 或者false ,一旦是true就显示这个标签,否则执行v-else
的标签
<!DOCTYPE>
<html lang="en">
 ?<head>
 ? ?<meta charset="utf-8">
 ? ?<script type="moudle">
 ?  import {createApp} from 'vue'
 ?  createApp({
 ?      data(){
 ? ?    return {
 ? ? ?      test:"this is a testing dynamic text",
 ? ? ? ?  text:"yyyyyy",
 ? ? ? ?  attitude:true,
 ? ? ? ?  counts:{
 ? ? ? ?        count:0
 ? ? ? ?  },
 ? ? ? ?  color:"yellow",
 ? ? ? ?  newcolor:"blue"
 ? ? ?  }
 ? ?  },
 ? ?  methods :{
 ? ?    switchAttitude(){
 ? ? ?      this.attitude=!this.attitude
 ? ? ?  }
 ? ?  }
 ?  }).mount("#test")
 ? ?
 ? ?</script>
 ? ?
 ?</head>
 ?
 ?<body>
 ? ?<div id="test">
 ?      <h1 v-if="attitude">you are happy</h1>
 ? ? ?<h2 v-else>you are sad </h2>
 ? ? ? ?<button v-on:click="switchAttitude">
 ? ? ?  switch attitude
 ? ? ?</button>
 ? ?</div>
 ?</body>
</html>
?
?
? ?
结果截图:
官网案例:
<script type="module">
import { createApp } from 'vue'
?
createApp({
?data() {
? ?return {
? ? ?awesome: true
? }
},
?methods: {
? ?toggle() {
? ? ?this.awesome = !this.awesome
? }
}
}).mount('#app')
</script>
?
<div id="app">
?<button @click="toggle">toggle</button>
?<h1 v-if="awesome">Vue is awesome!</h1>
?<h1 v-else>Oh no 😢</h1>
</div>6.list render
<script type="module">
import { createApp } from 'vue'
?
// 给每个 todo 对象一个唯一的 id
let id = 0
?
createApp({
 ?data() {
 ? ?return {
 ? ? ?newTodo: '',
 ? ? ?todos: [
 ? ? ?  { id: id++, text: 'Learn HTML' },
 ? ? ?  { id: id++, text: 'Learn JavaScript' },
 ? ? ?  { id: id++, text: 'Learn Vue' }
 ? ?  ]
 ?  }
  },
 ?methods: {
 ? ?addTodo() {
 ? ? ?this.todos.push({ id: id++, text: this.newTodo })
 ? ? ?this.newTodo = ''
 ?  },
 ? ?removeTodo(todo) {
 ? ? ?this.todos = this.todos.filter((t) => t !== todo)
 ?  }
  }
}).mount('#app')
</script>
?
<div id="app">
 ?<form @submit.prevent="addTodo">
 ? ?<input v-model="newTodo">
 ? ?<button>Add Todo</button> ? ?
 ?</form>
 ?<ul>
 ? ?<li v-for="todo in todos" :key="todo.id">
 ? ?  {{ todo.text }}
 ? ? ?<button @click="removeTodo(todo)">X</button>
 ? ?</li>
 ?</ul>
</div>
结果截图:

7.Computed Property
A computed property tracks other reactive state used in its computation as dependencies. It caches the result and automatically updates it when its dependencies change.
<script type="module">
import { createApp } from 'vue'
?
let id = 0
?
createApp({
 ?data() {
 ? ?return {
 ? ? ?newTodo: '',
 ? ? ?hideCompleted: false,
 ? ? ?todos: [
 ? ? ?  { id: id++, text: 'Learn HTML', done: true },
 ? ? ?  { id: id++, text: 'Learn JavaScript', done: true },
 ? ? ?  { id: id++, text: 'Learn Vue', done: false }
 ? ?  ]
 ?  }
  },
 ?computed: {
 ? ?filteredTodos() {
 ? ? ?return this.hideCompleted
 ? ? ? ?? this.todos.filter((t) => !t.done)
 ? ? ?  : this.todos
 ?  }
  },
 ?methods: {
 ? ?addTodo() {
 ? ? ?this.todos.push({ id: id++, text: this.newTodo, done: false })
 ? ? ?this.newTodo = ''
 ?  },
 ? ?removeTodo(todo) {
 ? ? ?this.todos = this.todos.filter((t) => t !== todo)
 ?  }
  }
}).mount('#app')
</script>
?
<div id="app">
 ?<form @submit.prevent="addTodo">
 ? ?<input v-model="newTodo">
 ? ?<button>Add Todo</button>
 ?</form>
 ?<ul>
 ? ?<li v-for="todo in filteredTodos" :key="todo.id">
 ? ? ?<input type="checkbox" v-model="todo.done">
 ? ? ?<span :class="{ done: todo.done }">{{ todo.text }}</span>
 ? ? ?<button @click="removeTodo(todo)">X</button>
 ? ?</li>
 ?</ul>
 ?<button @click="hideCompleted = !hideCompleted">
 ?  {{ hideCompleted ? 'Show all' : 'Hide completed' }}
 ?</button>
</div>
8.Lifecycle and Template Refs
we need to manually work with the DOM.
<script type="module">
import { createApp } from 'vue'
?
createApp({
 ?mounted() {
 ? ?this.$refs.pElementRef.textContent = 'mounted!'
  }
}).mount('#app')
</script>
?
<div id="app">
 ?<p ref="pElementRef">hello</p>
</div>
9.Watchers
The watch callback is called when count changes, and receives the new value as the argument
<script type="module">
import { createApp } from 'vue'
?
createApp({
 ?data() {
 ? ?return {
 ? ? ?todoId: 1,
 ? ? ?todoData: null
 ?  }
  },
 ?methods: {
 ? ?async fetchData() {
 ? ? ?this.todoData = null
 ? ? ?const res = await fetch(
 ? ? ? ?`https://jsonplaceholder.typicode.com/todos/${this.todoId}`
 ? ?  )
 ? ? ?this.todoData = await res.json()
 ?  }
  },
 ?mounted() {
 ? ?this.fetchData()
  },
 ?watch: {
 ? ?todoId() {
 ? ? ?this.fetchData()
 ?  }
  }
}).mount('#app')
</script>
?
<div id="app">
 ?<p>Todo id: {{ todoId }}</p>
 ?<button @click="todoId++" :disabled="!todoData">Fetch next todo</button>
 ?<p v-if="!todoData">Loading...</p>
 ?<pre v-else>{{ todoData }}</pre>
</div>
10.Components
<script type="module">
import { createApp } from 'vue'
import ChildComp from './ChildComp.js'
?
createApp({
 ?components: {
 ? ?ChildComp
  }
}).mount('#app')
</script>
?
<div id="app">
 ?<child-comp></child-comp>
</div>
11.Props
A child component can accept input from the parent via props. First, it needs to declare the props it accepts:
Once declared, the msg prop is exposed on this and can be used in the child component's template.
The parent can pass the prop to the child just like attributes. To pass a dynamic value, we can also use the v-bind syntax:
<script type="module">
import { createApp } from 'vue'
import ChildComp from './ChildComp.js'
?
createApp({
 ?components: {
 ? ?ChildComp
  },
 ?data() {
 ? ?return {
 ? ? ?greeting: 'Hello from parent'
 ?  }
  }
}).mount('#app')
</script>
?
<div id="app">
 ?<child-comp :msg="greeting"></child-comp>
</div>
12.Emits
In addition to receiving props, a child component can also emit events to the parent:
The first argument to this.$emit() is the event name. Any additional arguments are passed on to the event listener.
The parent can listen to child-emitted events using v-on - here the handler receives the extra argument from the child emit call and assigns it to local state:
<script type="module">
import { createApp } from 'vue'
import ChildComp from './ChildComp.js'
?
createApp({
 ?components: {
 ? ?ChildComp
  },
 ?data() {
 ? ?return {
 ? ? ?childMsg: 'No child msg yet'
 ?  }
  }
}).mount('#app')
</script>
?
<div id="app">
 ?<child-comp @response="(msg) => childMsg = msg"></child-comp>
 ?<p>{{ childMsg }}</p>
</div>本文来自互联网用户投稿,该文观点仅代表作者本人,不代表本站立场。本站仅提供信息存储空间服务,不拥有所有权,不承担相关法律责任。 如若内容造成侵权/违法违规/事实不符,请联系我的编程经验分享网邮箱:veading@qq.com进行投诉反馈,一经查实,立即删除!
- Python教程
- 深入理解 MySQL 中的 HAVING 关键字和聚合函数
- Qt之QChar编码(1)
- MyBatis入门基础篇
- 用Python脚本实现FFmpeg批量转换
- 238.【2023年华为OD机试真题(C卷)】火星文计算(模拟-Java&Python&C++&JS实现)
- 生产经验——分区的分配以及再平衡
- GE反射内存卡5595交换机pci接口反射内存1553B航电通讯测试模块
- 2024啦,致敬最可爱的技术人!!
- 爬取的数据可以入表吗?怎样入表?
- js怎样改变元素的内容、属性、样式?
- echarts使用之柱状图
- 缓解Spring Core的“Spring4Shell”零日漏洞
- Java二分查找冒泡排序插入排序
- PySpark中DataFrame的join操作